WORLD CUISINE - ASIAN
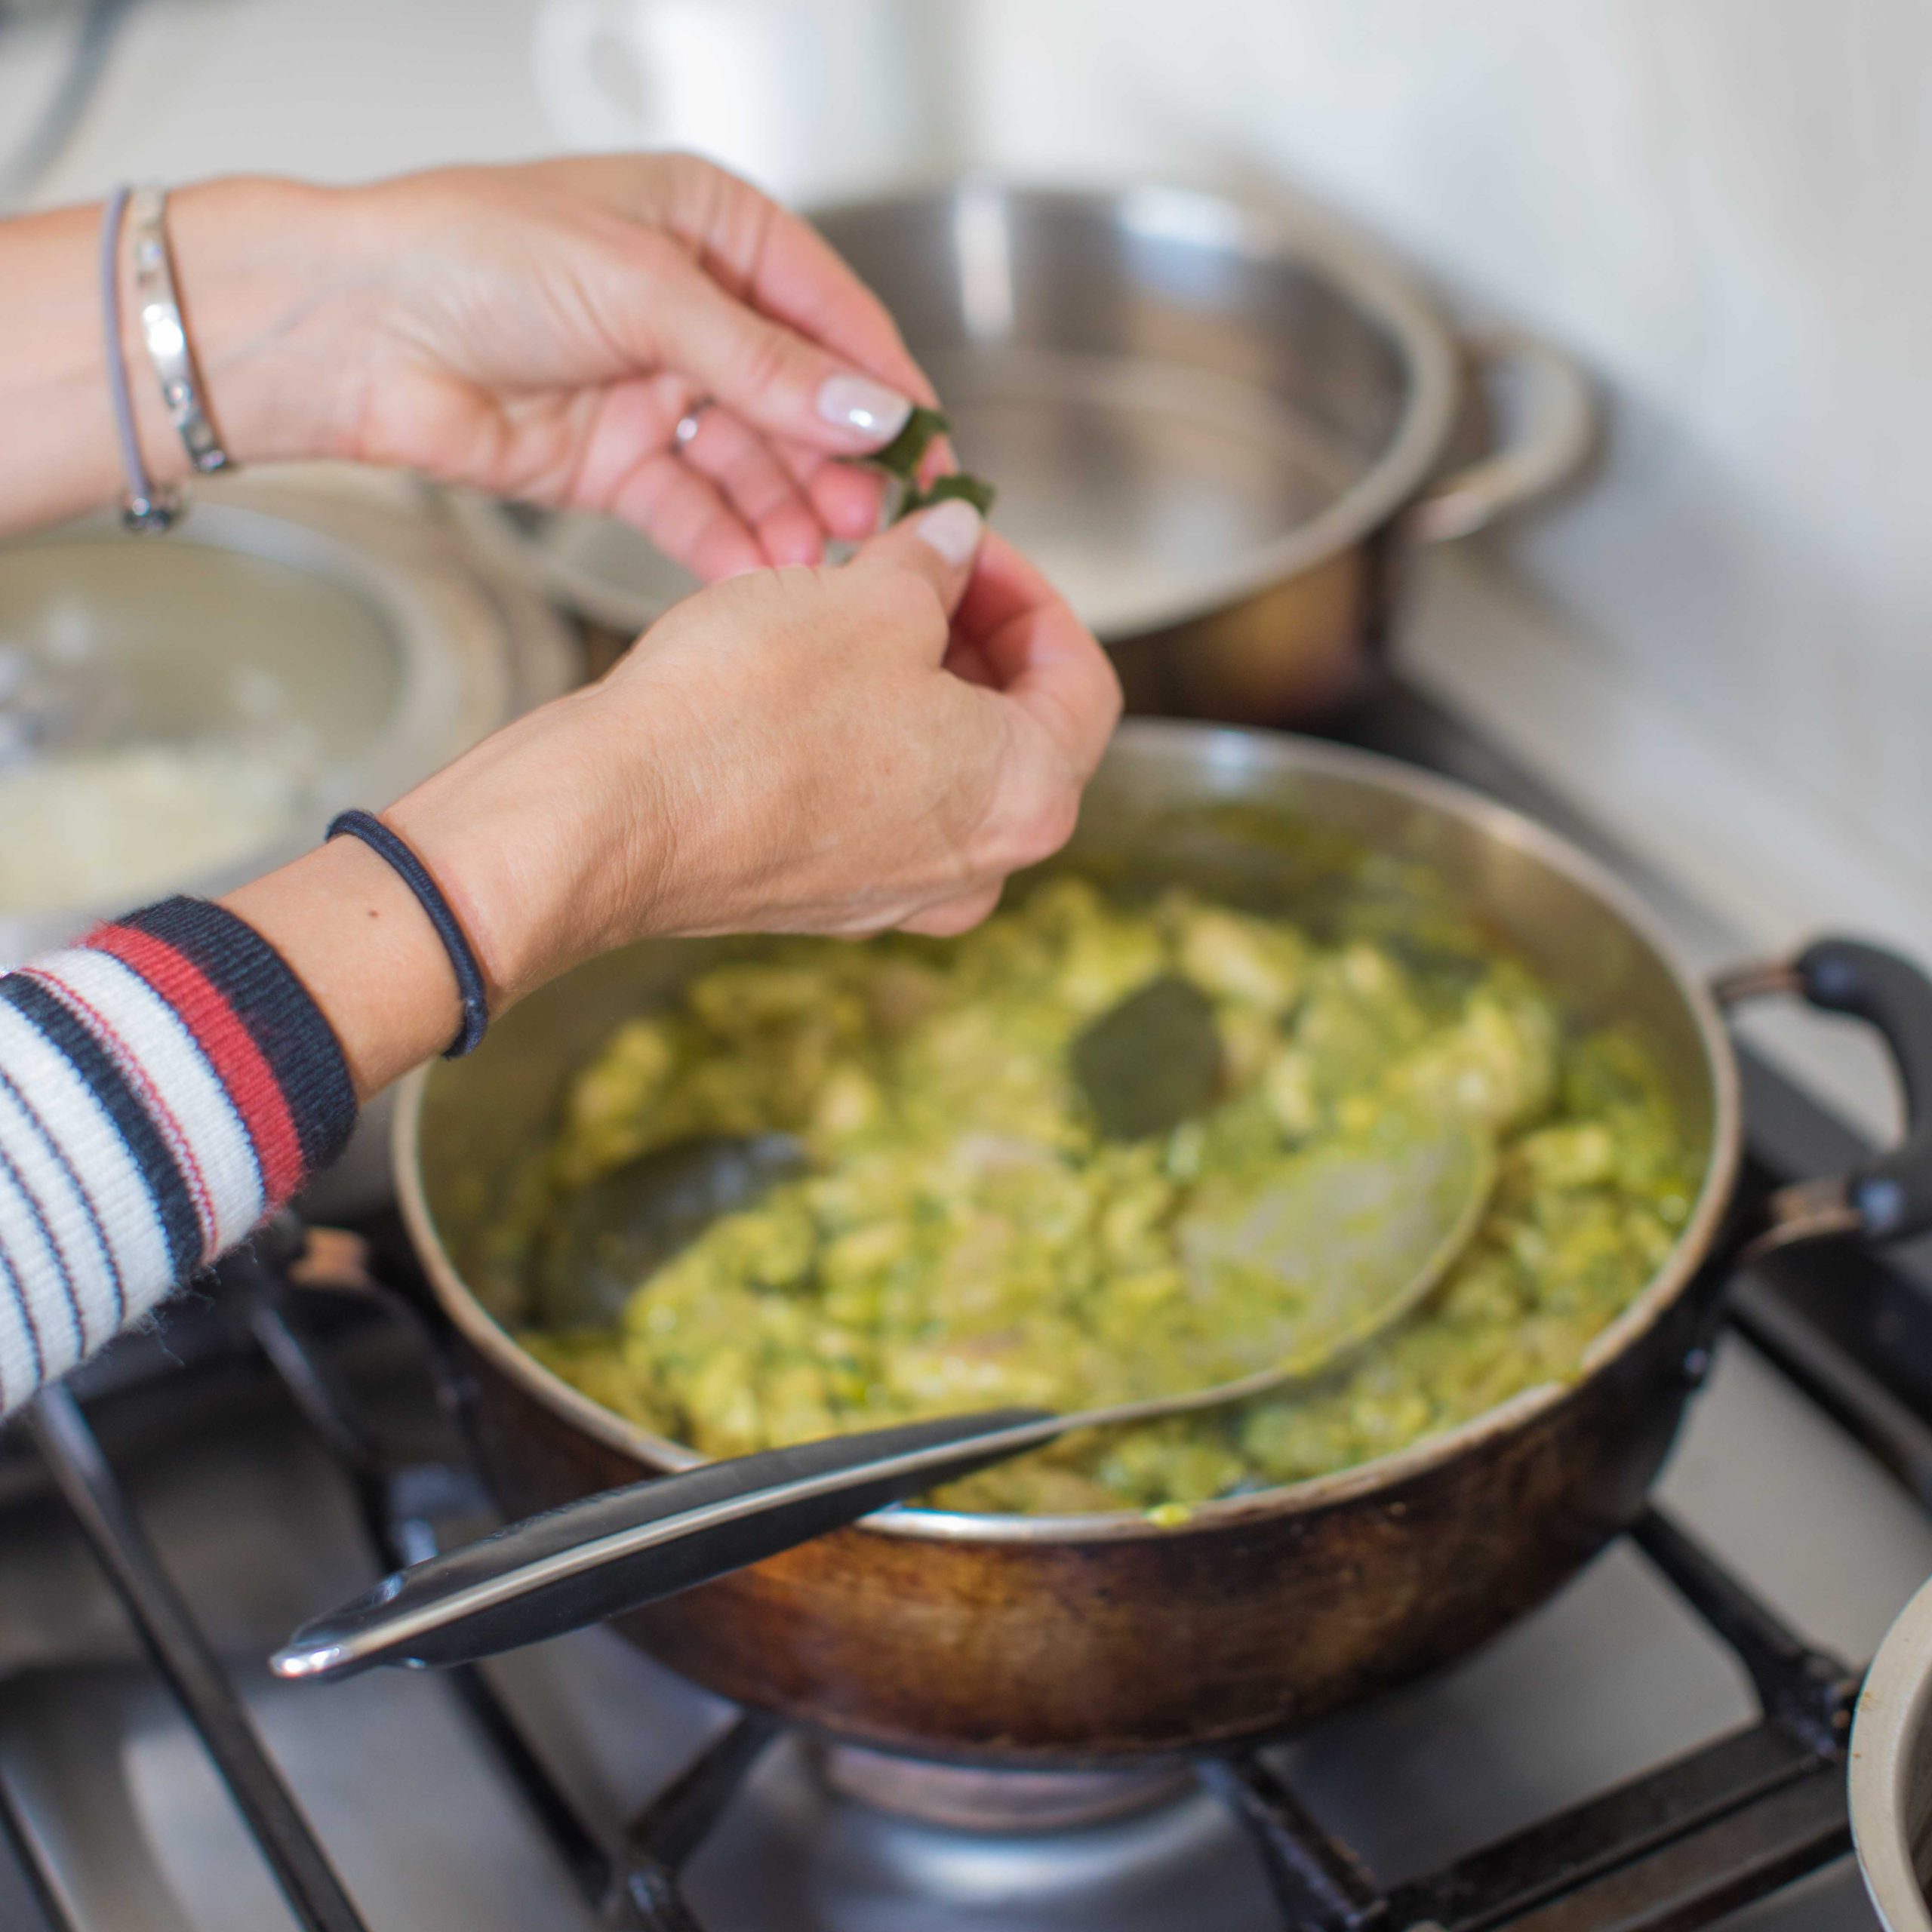
With a recent trend toward the energizing and healthy 5,000-year-old tradition of Ayurvedic cooking, I decided to take classes with one of the best in New York, and a fellow mother, Saira Malhotra. Indian cuisine, she explained to me, is “noisier—snap, crackle, pop” than say, the more gentle sounds of Thai cuisine, although both cuisines are among the healthiest you can eat

1) Cook the rice noodle in a large pan of water for 6 mins. Drain whilst running under cold water. Once fully dry, coat with noodle sauce and set aside. 2) Pound the chilies and garlic. In wide, non-stick pan, heat the oil, sauté garlic-chili paste for a few seconds, followed by the onions and Bell pepper slices. Remove half this mixture and set mixture aside. Add half the noodles and toss well and then let noodles stand so they can get crisp in paces. Once there is a brownish color with noodles crisp in places, remove from heat. Toss in half the tomatoes and bail leaves and place in a large bowl. Repeat with remaining noodles, sautéed vegetables, tomatoes and basil. Toss to combine together and finish with lime juice
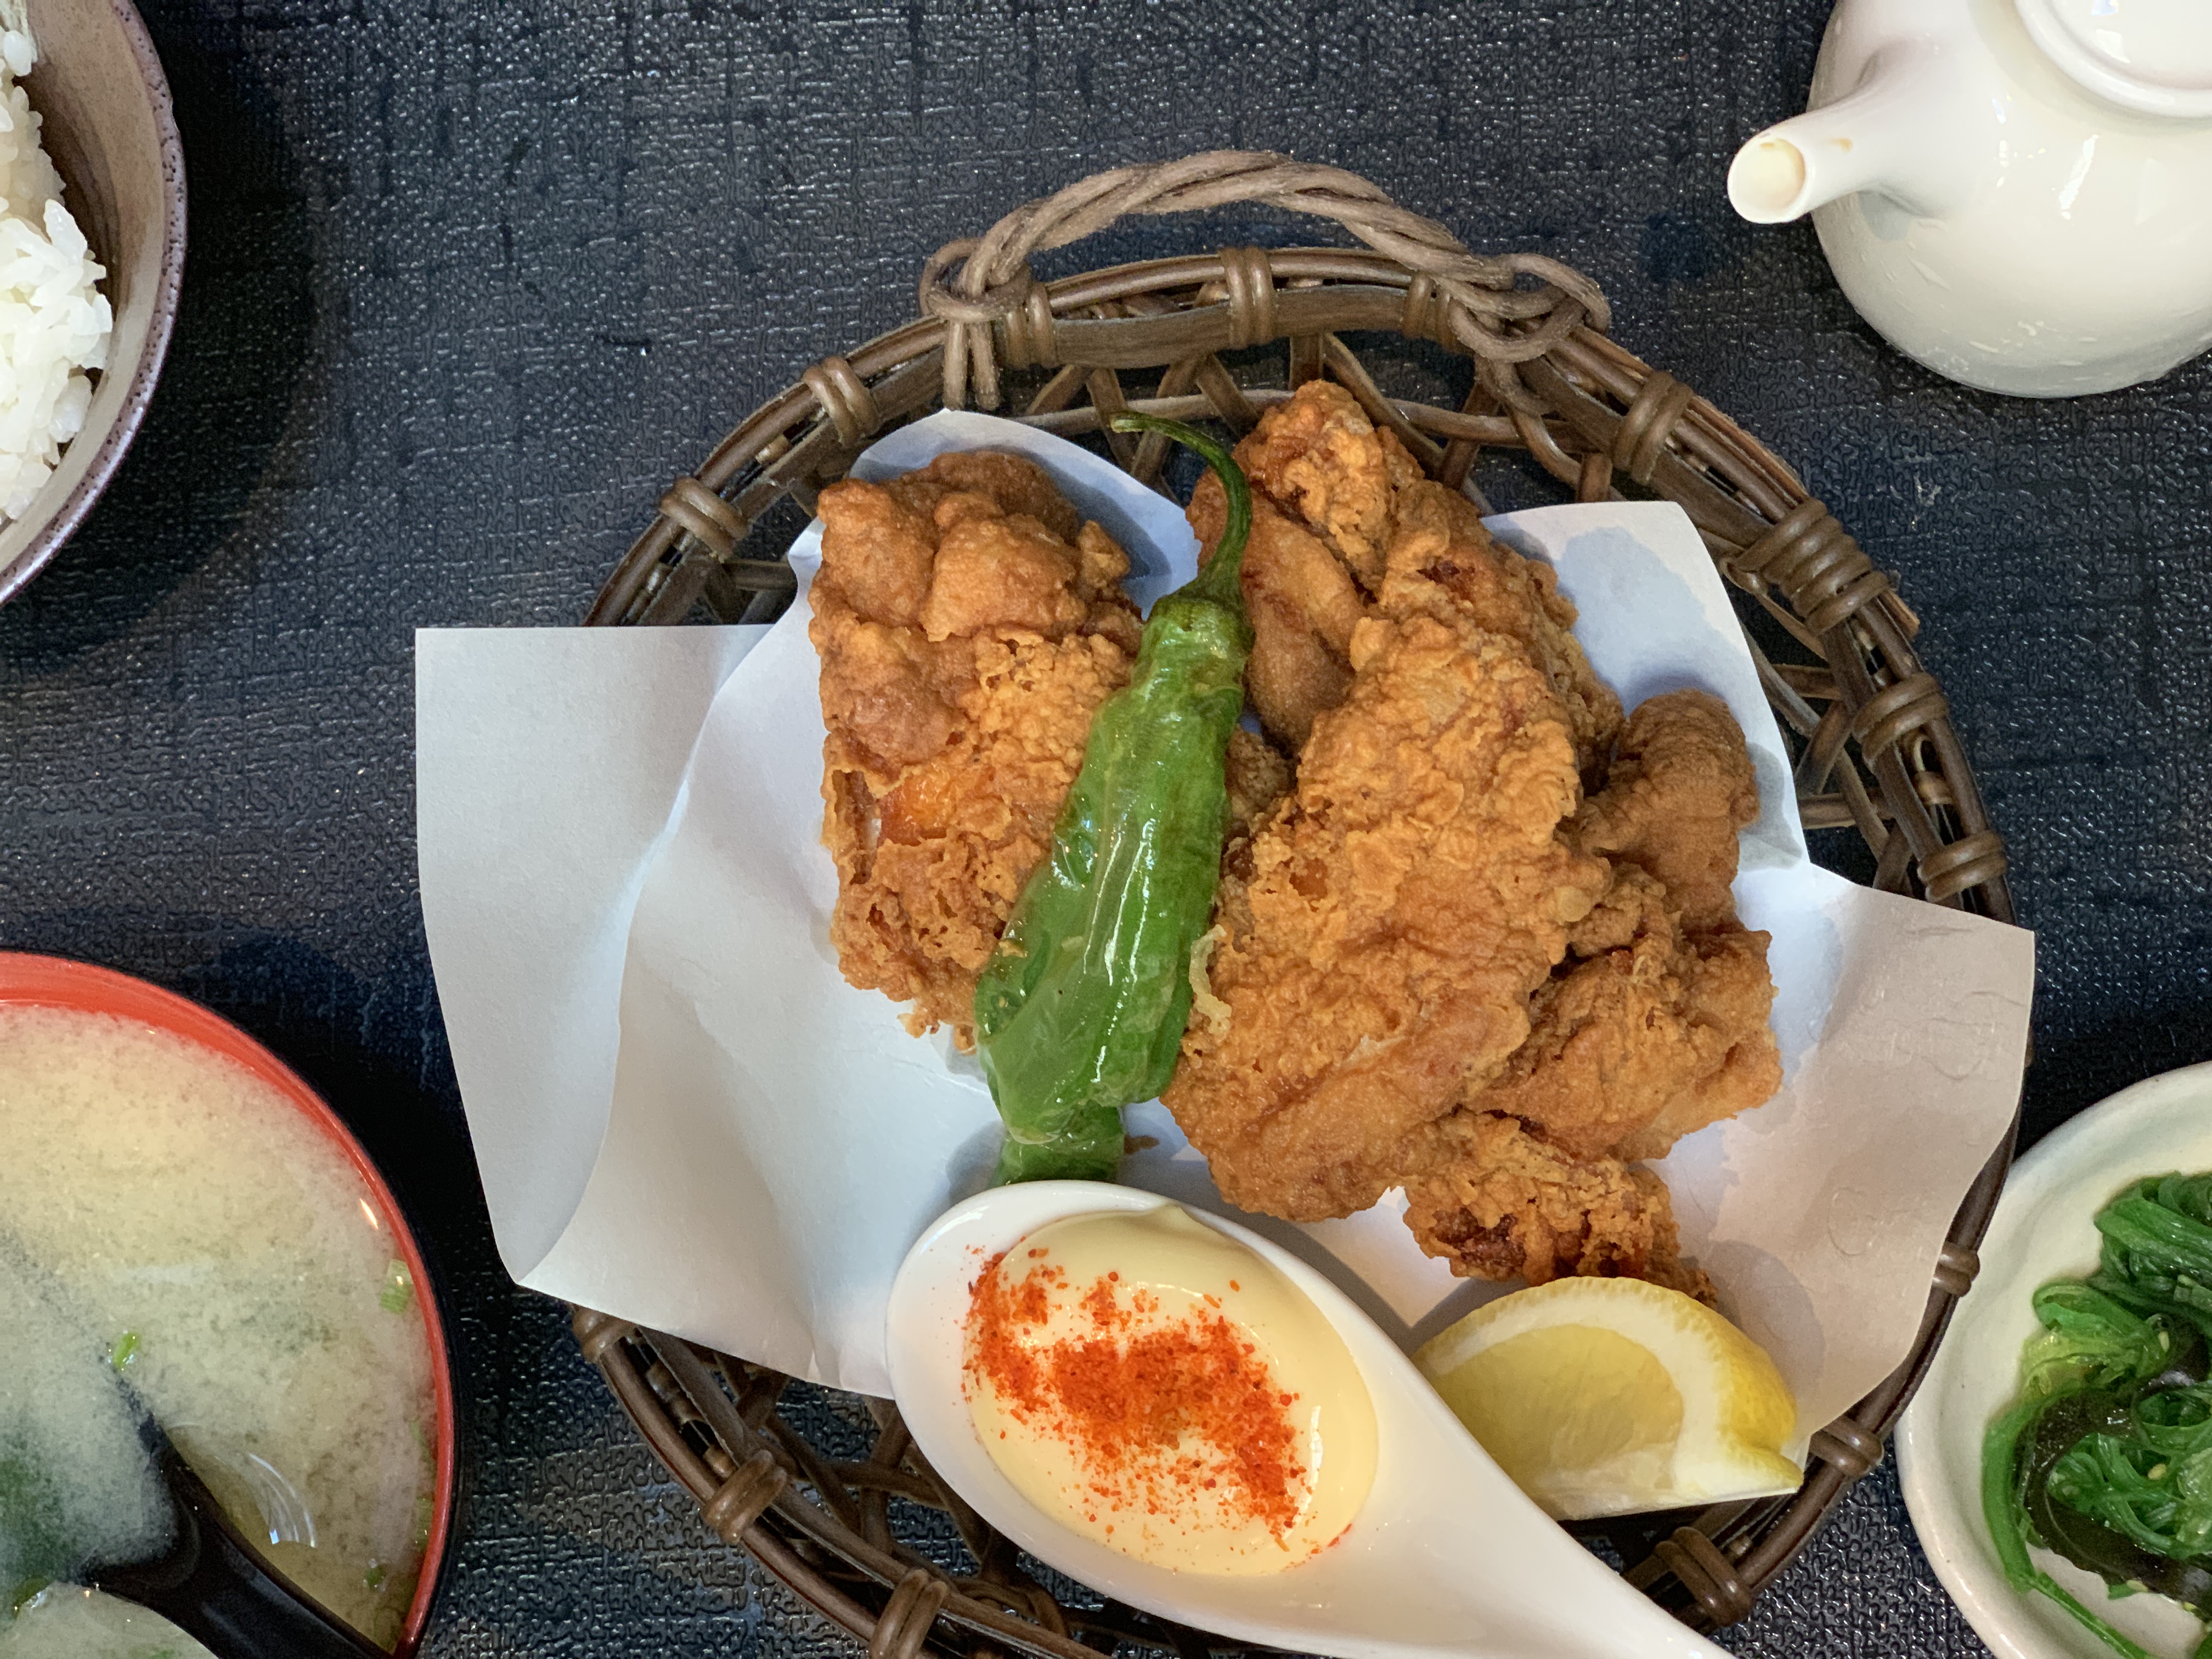
Japaese fried chicken is a quiet Powerhouse in the fried chickens community. Infact, other fried chickens are in need of pulling their socks up after taking a bite of this crispy, echoey, airily coated bird. What is the secret behind Japans favorite pub chicken’s success? Firstly, we are not frying-up entire limbs and fillets of breast. Instead, pieces are cut smaller, rolled in to flour and then fried. In other words – more surface area for that golden coating – after all, isn’t that what makes us weak at the knees!…

There’s always that one stand at the Farmers market that intimidates me. This time it was the chili stand. I love fresh chilies , especially when they are long and thin so I can snip them with my teeth. But here, it was a pick ‘n’ mix of shapes hitting different parts of the spice barometer. They were stunners, yet I felt like doing the runner. The vendor reassured me that I would in fact live if I ate one. I grabbed them and decided to cure them in salt and fennel seeds. This mellows them out and live a lot longer. The salt also makes the juices seep out and mingle with the spices creating a whole new range of flavors. Once the peppers have softened a bit, I finish them with hot mustard oil to sizzle them up. Mustard oil has a distinct aroma and is an oil that can stand up to heat and the spices. It adds oomph when drizzled over pastas and soups. As for making these cured and marinated chilies; it couldn’t be easier. They are simply sliced and coated with salt and spices. A few hour later, it meets it match with sizzling mustard oil and then put to bed somewhere cozy for 2 days. I love to serve these chilies as a condiment alongside a roast or even a cheese board, but my personal favorite is to smoosh it between 2 slices of bread. Recipe For Salt Cured-Chilies In Mustard Oil Ingredients 3 cups mixed chilies (sliced if large) ½ tsp. fenugreek seed ½ tsp. fennel seeds ½ tsp. mustard seeds ½ tp. Caraway seeds 2 teaspoons turmeric 1/4 cup salt 1/4 cup mustard oil 3 lemons, juice only Method 1) Roast all the spices on low-medium heat until an aroma emerges. Grind the spices in a coffee/ spice grinder 2)Sprinkle all over the chilies and set aside for 6-8 hours 3) Coat the chilies in to the lemon juice. Heat the mustard oil until you smell it. Pour it over the chilies and allow to sit in a warm place for 2 days

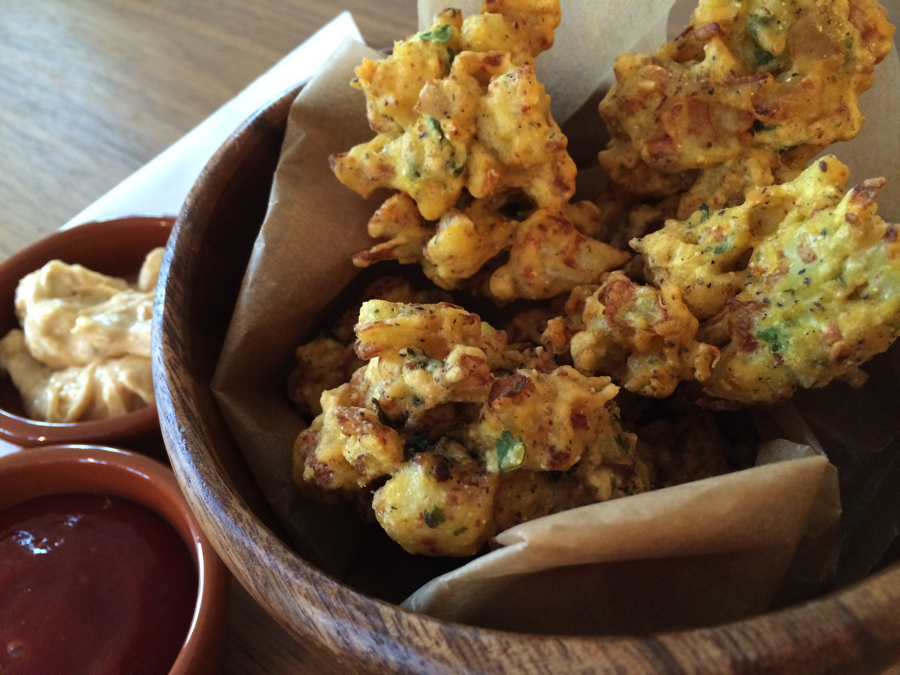
Espresso shot with sprite, cottage cheese with finely-diced ginger and chili, chips (or crisps depending on which side of the pond) doused with Tabasco sauce – these are just some of the atypical combinations my mind drifts in to. My latest infatuation is Gobi-Aloo (remember Bend It Like Beckham?) with Sundried tomatoes. Gobi-Aloo is the quintessential Punjabi sauté of cauliflower and potatoes in cumin and ginger. The only intruders this dish ever gets are peas or carrots. This was one of my favorite dishes growing up and the next day I would sandwich it between 2 pieces of bread and take it to school for lunch. However, it was time to re-invent a little. I added sun-dried tomatoes, a total stranger to Indian cooking. Sun-dried tomatoes have an intrinsically ‘achari’ taste(traditional sweet and sour Indian pickle made dried spices and oil). Surely that would make it a welcome addition to Gobi-Aloo. And they got on famously. It broke up this standard sauté with something a little playful. Something chewy, tart and a little sweet. If you like your veggies smushable, feel free to add a little water. I like mine pert and firm, leaving flavor with the no choice but to cling tightly to those florets and potatoes. Serving this alongside the rest of your Indian meal is an obvious choice, but how about replacing those roasted potatoes and steamed vegetable with this side for a little intrigue? I bet your dining guests will be very happy. Recipe For Gobi Aloo Ingredients 1 tsp. cumin 2 tbs. oil ½ a medium-sized cauliflower, broken in to florets 1 medium-sized russet potato, diced 1 tbsp. thinly sliced ginger 4 sun-dried tomatoes, soaked until plump, thinly sliced ¼ tsp. turmeric Salt and pepper Handful of cilantro Method 1) Heat a skillet with oil. Add cumin. As it turns 2 shades darker, add potatoes and cook until golden. Add ginger, turmeric, salt and pepper 2) Add the sundried tomatoes and cauliflower and toss to evenly coat. Cook covered until potatoes are cooked through and cauliflower is tender. 3) Remove the cover and cook on high heat until the moisture dries out. Sprinkle with cilantro

A few months ago, I came across Monica Bhide’s post on ‘Once Upon A Story’ where she provides a glimpse on Parsi food and a very popular dish for fried eggs on potato chips. Parsis came to India by way of Persia, settled in Bombay and developed a cross-cultural cuisine of Gujrati (simple vegetarian)-Persian food (carnivorous and complex). The result was to be found in the form of dishes like Dhansak (meats cooked in lentil gravy), Patra ni Machi (steamed fish in banana leaves) and Sali Murghi (spiced chicken with matchstick fried potatoes). The dishes are playful and with eggs over easy on chips for brunch, what could possibly make you more popular. If you break it down, the dish has every reason to be a winner. Cooked in a skillet with Indian sofrito of onion, ginger, garlic and green chili, the potato chips add an additional depth and soggy-crunchy texture. Now imagine those ingredients making a shell around the fried eggs. Recipe For Sunny-Side-Ups on Potato Chips Ingredients 1 tbsp. vegetable oil ghee and 1 tbsp. butter 1 small onion, finely chopped 1 tsp. ginger, grated 1 tsp. garlic, grated ½ tsp. green chili, finely diced 2 tbsp. chopped fresh cilantro ¾ tsp. salt ¾ tsp. pepper ½ tsp. cayenne 1 small packet of potato plain potato chips (Lays or Walkers) ¼ cup sharp cheddar, grated 4 large eggs 1 Tbsp. water Method 1) Lightly sauté the onions, ginger, garlic and green chili until onions become translucent (don’t brown as they will continue to cook under the egg). Season lightly with salt and pepper and add the cilantro 2) Gently crush the potato chips (not too small). Combine with grated cheese and lay them over the sautéed mixture. Create 4 wells and crack the eggs in to them. Season with salt, pepper and cayenne. Add 1 tbsp. water and cook covered until the whites become firm whilst the yellows remain soft and gooey. Remove from the skillet and serve with a butter toasted bread roll
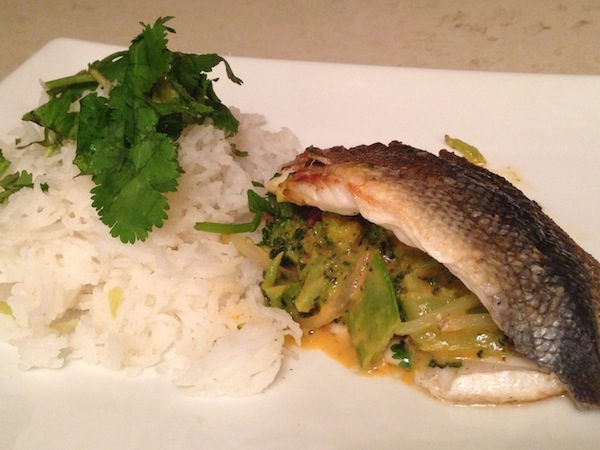
Last week, the Branzino whispered from its crushed-ice bed, ‘take me home and you’ll be happy’. Branzino is such an attractive fish that breaks apart with a bare nudge of a fork (I like to eat mine with a spoon). This mild mannered fish is like the perfect pair of jeans. Dress it up with bold flavors of ginger and chili and she shines or dress it down with a simple drizzle of olive oil and salt and pepper and she will stay a somewhat in the background. Since I wanted to stuff the fish, I asked the fishmonger to butterfly it (don’t be shy – if you don’t ask, you don’t get). Branzino is on the smaller sider and 1 whole fish serves 1, so why bother getting it filleted? It also has a flesh to fight for, so I recommend keeping that right where it is. Now, the question was, what to stuff it with. The Mediterranean way felt predictable which is perfect for days I can’t handle surprises, but today just wasn’t one of them. I went for something that borrowed from Thai ingredients – vegetables cooked in reduced red curry sauce and served with a mound of cilantro and mint rice. The tang in this dish from the red curry, the fragrance from the lemon grass, the rounded flavor from the coconut milk and the perfectly crisped skin from the outside protecting the most delicate white flakes made this a dinner to be repeated. Recipe for Branzino Stuffed With Thai Red Curry Stuffed Ingredients Stuffed Fish 4 branzinos, butterflied, washed and towel dried 1 can unsweetened coconut milk 1 cup broccoli ½ cup sugar snap peas 1 zuccchni, julienned 1 tbsp. red curry paste 1 can coconut milk 2 tbsp. cooking oil handful of cilantro leaves Juice of 1 lemon ½ tsp. sugar Steamed Rice 1 cup jasmine rice 1 ¾ cups water 1 tsp. salt Handful of fresh cilantro 10 mint leaves, roughly torn Method Steamed Rice 1) Combine water, salt and rice, bring to boil, reduce to simmer and cook covered with a lid for 15 minutes 2) Once tender, serve with loose cilantro and mint leaves over the top Fish 3) Pre-steam all the vegetables individually until al dente, refresh in an ice-bath and drain on paper towels 4) In a separate saucepan, heat half the oil and add the red curry paste. Cook until oil separates. Add the coconut milk and reduce the sauce by 1/2. Add the lemon juice, sugar and check for seasoning (the paste already has some salt, adjust accordingly) 5) Add the vegetables to the sauce and cook until vegetables are tender 6) The fish: Season the skin with salt and pepper. On a hot frying pan, lay the fish skin side down and open to crisp the skin. On one side of the fish, lay down the veggies and lift the other side over to close the flap. Cook for approx. 3 minutes until fish is barely cooked through

The whole dim sum experience is a culture in itself. Glazed eyes that push carts around a room, stacks of bamboo steamers, drizzle bottles filled with soy sauce – these are just some of the necessary components of enjoying dim sum, tight little parcels filled with proteins and veggies. Like a poker game, there is little conversation to place your order. All you need is a dim sum check sheet, a pencil to mark off your choices and a delicate nod to indicate your next hand. What is so special about these delicate little sheets wrapped around shrimp, pork, chives and veggies? Is it their translucent, moist and mildly chewy skin? Is it the surprise of the ingredients that lie within or perhaps the bite-sized pressies that fit in to the mouth in one go? Whatever drives you to eat them, there is no question that it fulfills it’s promise by the very suggestion of it’s name ‘touch of the heart’. The challenge with dim sum is the lines in all the best dim sum houses. Whilst they move fast, that just doesn’t always work when you have a 5 year old swiping the order sheets from all the tables whilst the 7 year old eats soft mints by the exit ‘en clandestine’. We all love them and the communal aspect makes it even more enticing, but now we just make them at home. Firstly, it is surprisingly easy (even the folding part), secondly, you fill them with whatever you want and thirdly, you can use left overs in soups and broths. There is no rolling, no fancy pleating; just good old store bought wonton, some shrimp and fresh herbs. Ingredients 1 package Nasoya wonton wrappers (or any brand, we would think) 1 pound of fresh shrimp, de-shelled and de-veined 3 tbsp. finely chopped cilantro 1 tbsp. chives, finely chopped salt to taste 1 tbsp. sesame oil ¾ tsp. ginger and garlic paste Steamer Dipping Sauce ¼ cup of soy sauce 4 tbsp. rice wine vinegar 1 fresh chili, sliced finely (optional) 1 tbsp. ginger, julienne 1 tbsp. scallion, chopped Method – Line a plate or tray with saran wrap (to set the dim sum on so they don’t rip off) – Set a steamer aside to get hot 1) Roughly chop half the shrimp in the food processor and cut the rest as finely as possible 2) Combine all the ingredients except for the wrappers 3) Set the wrapper in front of you in a diamond shape. Place filling in the center of wrap, fold over in half, moisten edges with water. Press to seal and join the wrapper ends 4) Grease the base of the steamer. Steam for 5 minutes. Serve immediately with sauce

When it comes to Asian cuisines, in my home, we are equal opportunity eaters – Indian, Thai, Japanese, Malaysian – you name it and we’re there. Last Friday, my refrigerator action was in the hands of a sad carrot, scant baby bella mushrooms, a laquer-dly green bell pepper (why do I bother with those?) and a couple of eggs. It was time to pull inspiration from my Asian flavors and transform these loners into a cohesive dish through purpose and intention rather than neglected souls drawing their last breath in a dish. I thought of making fried rice but just a little different. Rather than cooking neat separate grains that shuffle evenly amongst the vegetables, I was thinking of being more Bim Bim Bop (Korean deconstructed rice) about the dish – . sautéing the rice on high heat so it sticks together in places and forms a crust and throwing on a sunny-side egg. Once all the vegetables were steamed or wokked up, they were pulled out and reserved until the steamed rice was finished. And what a finish! The soft white grains were given a searing in sweet thai chili sauce (often called chicken sauce as it is served with bbq chicken), the veggies were thrown back in to the rice with a rough comb through and the dish was served volcanically hot with a fried egg on top. My dining companions were pulled-in by the drama of the presentation (funny how a frilly fried egg could do that). They proceeded to make the dish their own as they broke the fried egg in to the rice, partly spooning the yolk in to there mouth and partly using it as a dressing for the rice. Recipe for Adapted Fried Rice Ingredients Cooking oil 1 tsp. sesame oil 2 cups long grain white rice, Jasmine or Basmati, cooked 1 medium-sized onion, finely diced 1 medium-sized carrot, finely diced ¼ cup of green peppers, finely diced ¼ cup of baby bella mushrooms (brown-skinned) ¼ cup of green beans or peas ¼ cup of scallion, roughly chopped (white and light green part only) 1 tsp. ginger, grated 1 tsp. garlic, grated Salt and pepper 4 tbsp. sweet chili sauce 2 tbsp. soy sauce Eggs (one per person) Method 1) Carrots: Bring a large pot of salted water to boil. Cook the carrots until barely tender. Drain. Refresh in iced water for 5 seconds, drain and set aside. Cook green beans or peas in the same way 2) Saute in cooking oil separately the onions for 2 minutes on high heat, then the mushrooms and then the green peppers – Sprinkle salt on each and set aside 3) In the same pan, heat the cooking oil and ½ a tsp. of sesame oil. Add half the chili sauce and soy sauce. Saute half the ginger and garlic, add half the rice and allow it to brown from the bottom to form a golden crust, turning in places. Cook the second batch of rice the same way. Consolidate the rice back in the pan 4) Throw in all the vegetables, onions and scallions and roughly combine. Check for seasoning 5) Serve with a fried egg on top
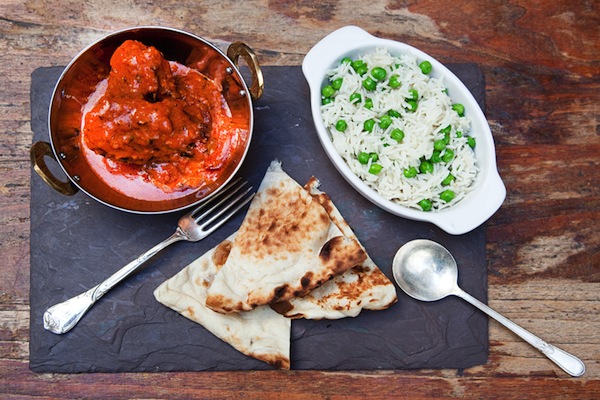
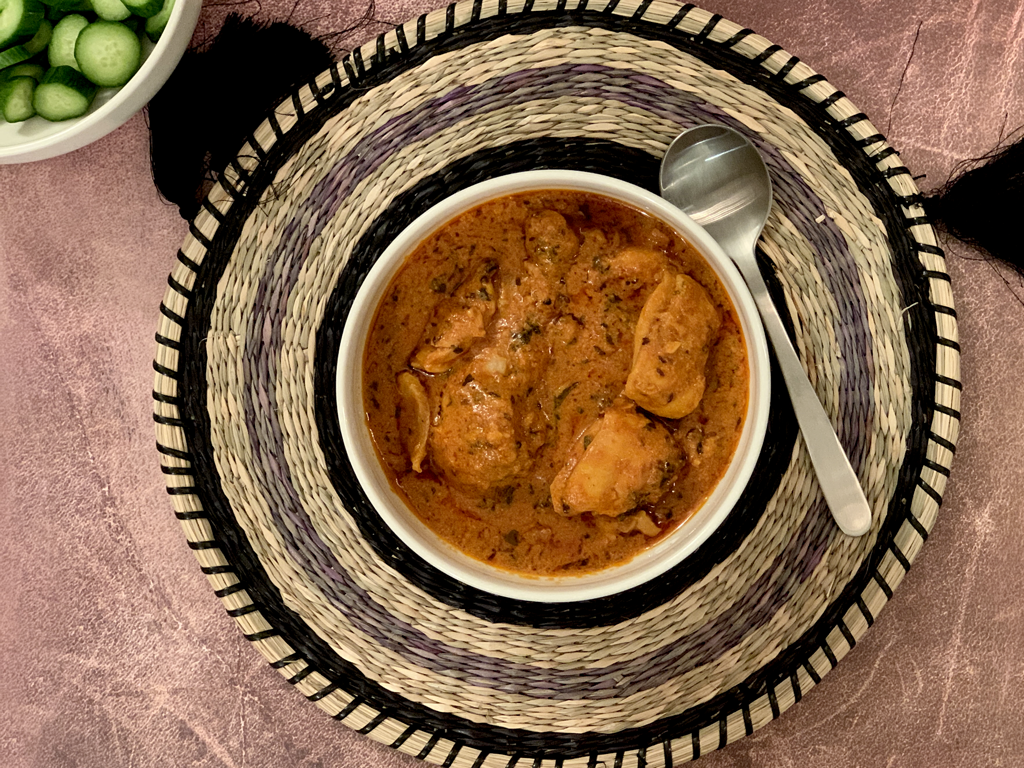
Time flies when you’re having fun. A few months ago, the Curry Club was just an idea. Now 4 curry nights later, here we were saying good-bye to The Jones Wood Foundry as they hosted the final night of series 1. Being the last evening, it called for the Godfather of all British curries – The Chicken Tikka Masala or rather, CTM. If you are going weak at the knees on reading ‘CTM’, you are not alone. When smoky BBQ’d chicken simmers in a buttery and creamy tomato sauce, the only option is to cave in! As people mop-up the last streaks of sauce in the bowl with naan bread, few realize that this dish has been the bearer of many stories. Some say the dish is Indian and is based on the classic ‘butter chicken’, others say its was a British invention and brought over by the soldiers when they returned from India. But the most creative story is that of the giddy chef who dumped a can of cream of tomato soup in his patrons BBQ chicken tikka after the patron requested a little gravy on the side (if that were truly the case, I doubt it would be a global favorite!). Whilst people fight over CTM’s origins from Punjab to London, I remember the cardinal rule – never discuss politics! Instead, open a chilled beer and indulge in this recipe of lightly charred chicken pieces cooked in a devilishly delicious sauce – the experience will be bloody good mate! Recipe for Chicken Tikka Masala Ingredients 2 lb. Chicken Skinless Thigh Marinade 1 TBSP. Ginger, minced 1 TSP. Garlic, minced ¾ Tsp. Salt ½ TSP. Chili powder/ Cayenne pepper ½ TSP. Garam Masala ½ TSP Pepper 1 TSP. Smoked Paprika 1 TSP. Ground cumin 1 TSP. Roasted and ground coriander seeds 2 TBSP. Lemon Juice 1 cup Greek yoghurt ½ cup Sour Cream 2 TBSP. clarified butter Sauce 1 TBSP. Cooking Oil 1 tsp. cumin seeds 1 heaped TSP. Kasturi Methi (crushed by hand) ½ TSP. Turmeric 2 TSP. Ginger 1 TSP. Garlic 1 TBSP. Roasted, skinned and deseeded red bell pepper puree ¾ of a can (14 oz) tomato sauce ½ TSP. Black pepper 1 TBSP. Lemon Juice ¾ TSP. Sugar 1 Quart Heavy Cream 4oz piece of butter (cold to swirl at the end) Garnish: Cilantro Method Marinade 1)Place chicken in mixing bowl with salt, pepper, ginger, garlic, lemon juice and spices for 6-12 hours 2)Remove from refrigeration and marinate in sour cream and clarified butter. Marinade for at least 4 hours 3)Remove from refrigeration and allow meat to lose it’s chill. Thread through skewers and broil/ grill on high heat basting with marinade sauce frequently throughout. Cook through completely – Cool on wire racks. Remove thigh bone Sauce 4)Set aside a sauce pan and reduce heavy cream to half 5)Heat oil in a pan, fry cumin seeds, as they turn dark red, add turmeric and crumble in the kasturi methi. Saute for 40 seconds until aroma essential oils release and a strong maple smell emerges 6)Add the ginger and garlic and allow to golden 7)Add red bell pepper paste and cook out excess moisture 8)Add tomatoes and cook until oil separates, then add pepper, coriander powder and garam masala and sugar 9)Add lemon juice, mix in, add the reduced cream, remove from heat and swirl in cold cubes of butter. Butter should have totally melted and sauce should be smooth
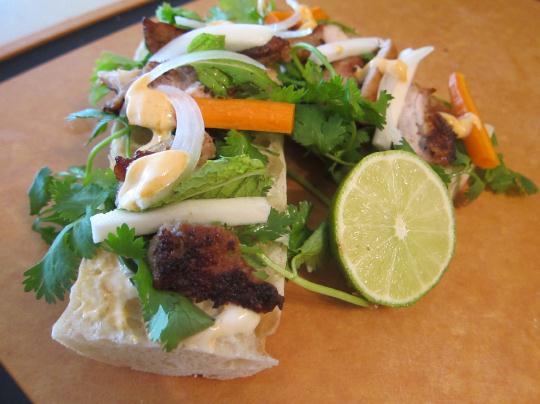
In recent years, the Banh Mi has claimed its stake in the sandwich world. Enclosed in a crisp baguette lie Vietnamese treated ingredients. Whilst cilantro, pickled daikon and carrots and sriracha chili sauce are resident contents, there are also a variety of sandwich fillings from which to make your choices, such as, spicy pork, bbq chicken, cold cuts and pates echoing a French past. I remember being introduced to the Bahn Mi 2 years ago, albeit a delayed introduction. Looking at the sandwich, it didn’t seem unacquainted, after all, it was home to dishes I had eaten in some fashion before – the pickles and spicy pork were similar to something I had eaten at a Korean BBQ and the pate – well, what charcuterie plate in France doesn’t have a piece of pate on the board? Yet, this combination encased in a baguette was the novelty for me. I made a Banh Mi with honey BBQ chicken (not literally BBQ’d, pan searing does the trick). The sandwich was full of contrasts – hot and cold, soft and crunchy and lightly sweet, smoky and very savory. If you have any leftovers, make an Asian chicken salad the next day. Recipe for Banh Mi And Quick Pickles Ingredients – Serves 4 4 French demi-baguettes Couple of handfuls of cilantro (stems slightly trimmed and roughly chopped) 1 sliced onion, white 1 fresh lime Honey BBQ Chicken 4 chicken thighs, boneless and skinless ¼ cup soy sauce 1 tsp. ginger and garlic paste 1 tbsp. rice wine vinegar ¾ tsp. Chinese 5 spice 1 tsp. salt ½ tsp. pepper 1 tbsp. cooking oil 1 tbsp. honey for basting Quick Pickles 1 cup water 1 cup rice wine vinegar 1/8 of a cup of salt ¾ cup sugar 1 tsp coriander seeds 2 fresh chilies 1 carrot peeled and sliced in to matchsticks 1 daikon, peeled and sliced in to matchsticks (or turnip) Spicy Mayo 1 tbsp. srirarcha hot sauce ¼ cup mayo 1 tsp. sesame oil Method Prepping 1) Marinade the whole thighs in all the ingredients except for honey and oil. Set aside 20 minutes 2) Pickling: Put the carrots and daikon in a bowl. Bring remaining ingredients to a boil and pour over carrots and daikon. Set aside for atleast 20 minutes 3) Bread: Slice in half and hollow out the insides a little to create a recess 4) Spicy Mayo: Combine srirarcha and mayo 5) Wash and drain cilantro and set aside with the sliced onions Making the sandwich 6) Heat a frying pan, shake off excess liquid on thigh and lay down on pan, flattening with a slotted spoon. Cook through, increase heat to crisp up, brush oneside with the honey and cook honey side down for 30 seconds – set aside and allow to rest for about 4 minutes before slicing (to allow juices to redistribute) 7) Spread the spicy mayo on the bread, lay the cilantro in to the base of the bread, slice the thighs and lay pieces on the cilantro, throw on the pickle and drizzle fresh lime juice and srirarcha
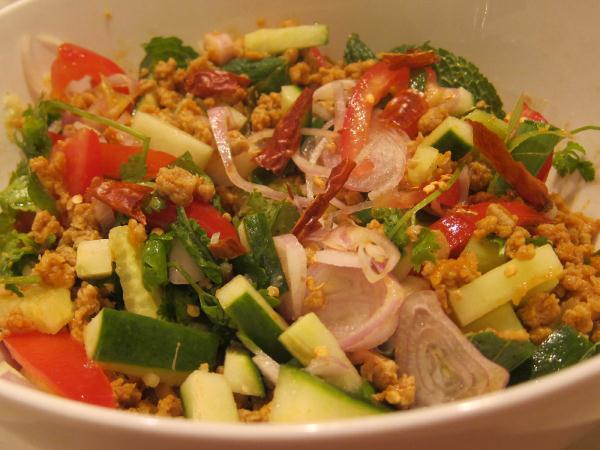
I am not sure when we first had it, but when we did, it became a favorite. Let us say that where Thai food is concerned, this dish doesn’t get much ink. The curries are certainly very popular, be it red, green or jungle, for the sautéed dishes, anything stir fried with basil will do nicely and as for the salad, Thai beef and papaya salad top the charts. But Chicken Salad, also known as Larb Gai is a winning dish. This dish is not the usual dull typical chicken salad coated in a waxy dressing and it does not have that ‘barnyard’ smell that most chicken salads have. That is because the chicken is served warm. It is also not in the form of a huge hunk of meat prohibiting any penetration of flavor, but rather, ground crumbly chicken that is coated in a spicy sauce. Now, close your eyes and imagine opening you mouth to a citrussed-lemon grass salad with fresh onions, chili and mint, only to be slightly wilted by warm and piquant ground chicken straight from the pan. The dish is then given a final toss with fresh sprigs of coriander and sprinkled with toasted ground rice for a bit of texture. Can‘t you just taste it already? Ingredients Ground chicken 1 lb ground chicken 1 tsp. red curry paste 1 finely sliced shallot 2 kaffir lime leaves, julienned 2 tsp. fish sauce (Nam Pla) 1 tbsp. oil ¼ cup of water Salad 1” piece of lemongrass, finely minced Juice of 2 limes 1 garlic clove 2 large fresh shallots Handful of mint leaves Handful of cilantro 2 red birdseye chilies or a green chili Salt to taste 1 tbsp .rice Method Chicken 1) On medium heat, heat oil and cook the red curry paste for a minute to lose the raw taste 2) Add the ground chicken and ¼ cup of water with lime leaves, lemongrass and fish sauce and cook until done – make sure there is always enough moisture so that chicken doesn’t brown Salad 1) Combine all salad ingredients, toss well 2) Add the chicken whilst hot, give it a final toss and serve immediately
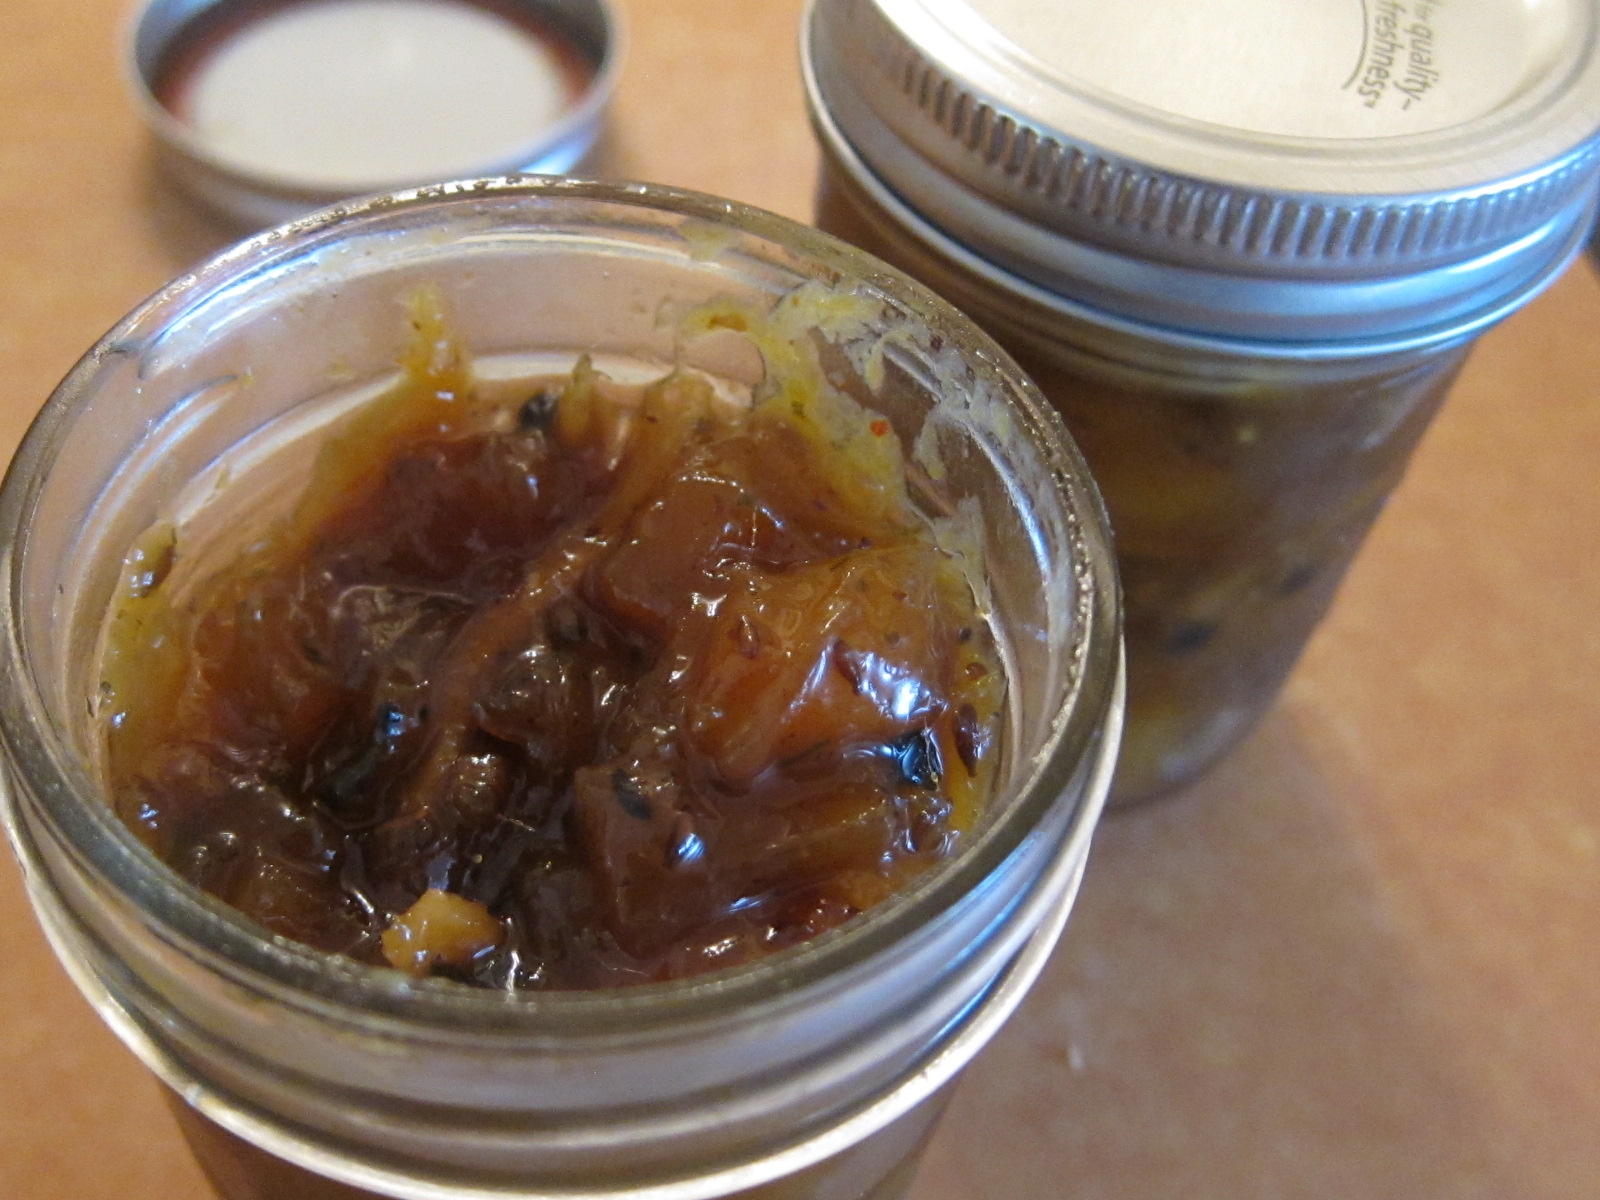
Grandmothers could fill books on practical measures for sustainability, respecting ingredients and getting mileage from having very little resources. Many of them have lived through wars or belong to early settling immigration communities where they had to work very hard for what they had. My nanima was certainly amongst this generation of people. The word ‘wastage’ did not exist for her and through her reverence for food, even today; she continues to connect with food in a way which was unfamiliar to me until recently. If there was an excess of certain unused produce, she found a way to put them to work. If the season was closing in on certain fruits and vegetables, she would preserve them through pickles, chutneys and Indian salsas. First of all, how resourceful! Secondly, at any given moment in our home, there was always a few of her condiments in our refrigerator that would brighten up even the dullest of sandwich. Lemon and ginger that ferments in its own juices, positively pungent mango pickle in mustard oil, mint pesto like chutney were just resident pickles at our home. Lately, I have taken her philosophy and incorporated it with some of my other influences. With an abundance of mangoes at home, I made the classic Anglo-Indian ‘mango chutney’. Mango chutney is a derivation of the traditional Indian mango pickle, only it is sweeter and has a jam-like consistency. It has been a mainstay at restaurants in the U.S. and U.K. and is served with poppadum’s. The chutney was such a hit amongst my kids and as I saw my younger son slather it over his roast chicken, it jostled me to become a little more inventive with my usage of it. I tried it later that evening with goat cheese on a cracker and gave my fig spread a break, what a combination! The chutney has sweetness from the mangoes but the spices and vinegar give it that ‘pop’. Even though it may take an hour to fully mature and lose moisture on the stove, it couldn’t be less demanding of your active participation. Ingredients 3lb Ripe Mexican mangoes, peeled and chopped in to small pieces 1 medium-sized onion, diced 2 tbsp. thinly sliced ginger 400g rice wine vinegar 400g jaggery (if you can’t find jiggery at your ethnic specialty store, substitute for sugar), broken down to small pieces 2 tbsp. cooking oil 2 fresh red or green chilies, chopped in to 0.5 cm pieces SPICES: 1 tsp. cumin seeds, coriander powder (or crushed coriander seeds), fenugreek seeds, nigella seeds 4-6 cloves 6 whole peppercorns Method * Sterilize the pickling jars in boiling water 1) Heat the oil. Add the cumin, fenugreek and Nigella seeds, coriander powder, cloves and whole peppercorns, allow them to turn a couple of shades darker. 2) Sweat the onions and fresh chili until the onions are translucent, add the jiggery/ sugar and vinegar and allow the sweetening agent to fully dissolve 3) Add the mangoes and ginger, bring to a boil and turn down to a simmer. Cook for approximately 1 hour or until the chutney has thickened and that ‘wet look’ from the mango juices have disappeared. The mango will have become translucent at this point and will have a sheen to it 4) Fill the sterilized jars whilst the chutney is still hot and seal
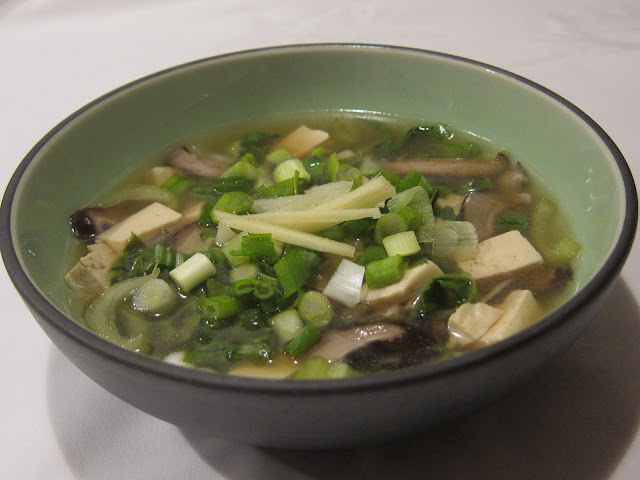
Last weeks Thanksgiving festivities were a complete binge for most of us and frankly a little scary since it was just the holiday season kick off. Sure, go ahead, blame the food, after all, it is completely responsible for your lack of restraint. Pushing yourself into, over and out of those jeans, that muffin top never looked so muffinous. Most of us are experiencing serious self-deprecation right now. We ate too much, drank too much and weightily drag ourselves around, dreading the next wave of merriments. When it gets this out of hand, you need to stop, regroup and take charge! Commit to the next couple of weeks of rest, exercise, plenty of fruits and vegetables and of course water and then reap the rewards of a perky complexion and a deflated stomach. The goal is attainable and will set you on the right track, feeling centered and less likely to revisit that gluttony any time soon. Todays dish has zen like qualities. It is gentle and calmly detoxes the body, leaving you feeling light and energized. A combination of bok choy, juliennes of ginger, mushrooms and tofu in a Japanese dashi soup boasts of clean and crisp flavors whilst helping your body feel at ease. Ingredients 4 teaspoons instant dashi powder, found at the Asian product aisle4 cups water3 teaspoons fresh ginger, finely sliced1 cup shiitake mushrooms, stemmed and thinly sliced½ cup of oyster mushrooms, broken at the seams by handOne package firm silken tofu, cut into small cubes3 bunches of baby bok choy2 tablespoons low-sodium soy sauce1 tablespoons mirin1 tbsp rice wine vinegar1 ½ tsp salt4 scallions, thinly sliced Method 1) In a saucepan, bring 4 cups of water to boil. Add the Dashi powder and bring to a simmer2) Add the remaining ingredients except for the Bok choy and scallions. Simmer for 5 minutes3) Add the Bok choy, simmer for a couple of minutes4) Remove from heat and serve in bowls and garnish generously with scallion greens Serving Suggestions Just a big bowl Pearl of Wisdom Don’t overcook the Bok choy as it will lose its nutritional value and its bright color
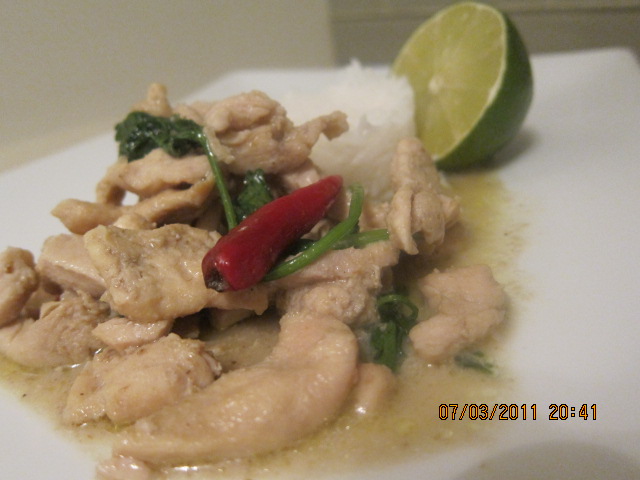
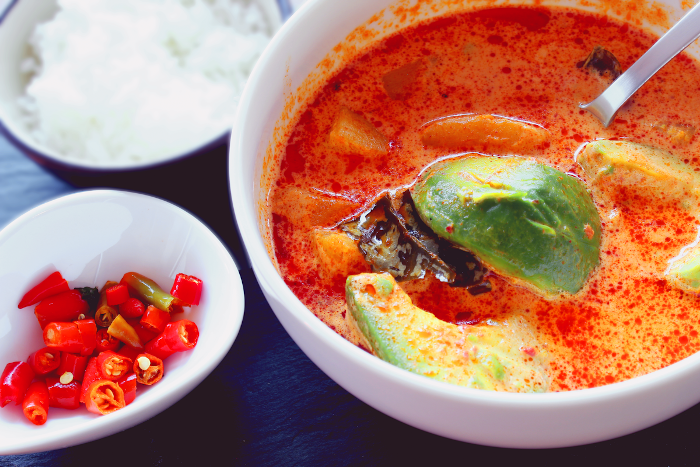
The Bachelor’s Black Book emerged from a conversation with my brother inlaw “Arjun”. He was visiting from San Francisco and was keen to check out my world at The French Culinary Institute. Being the stud that he is, his desire to schnozzle around the school surprised me. If he thought it was going to be a food court experience with servers handing out samples of coq au vin and escargots, he would certainly have to take that empty belly elsewhere. After his tour of the kitchens and the restaurant, ‘L’ecole’, we went to grab a drink. It was there that he revealed his brief stint at culinary school. After a break up with a girl who shall remain nameless, he was ready to hit the playing field. His two options: Zumba classes or cooking school. Doubting his exotic dance potential, he elected cooking school. So there he was that Thursday evening, single and ready to mingle. He walked into the class and froze. Was this really his class or were these people here for a seminar on time shares in North Carolina? He was at best 3 times younger than his fellow class mates. There was no turning back now, introductions had begun and the Frank Sinatra fans were rearing to share their stories of why they were there. As for his cooking skills, his meals certainly raised a few doubts, but as his instructor said, he excelled in his skills as a dishwasher. Today’s entry is for Arjun to restore his faith that he can put an exotic and delicious meal together. It is Thai green curry with a side of steamed white rice. A perfect balance of sweet, citrus, salt and fat with the guiding hand of simplicity. Warning: The aroma in this dish will fill your home and may pull neighbors to your door Ingredients 2” stick of lemongrass 1 ½ tbsp. green curry paste 1 can coconut milk 1lb chicken breast or thigh, cut into thin strips ½ fresh lime Handful of cilantro sprigs Rice Salt Oil Method Chicken 1) Heat oil in a pan on medium/high. Bruise the lemongrass by bashing with a knife in several places and add to the hot oil along with the green curry paste. Combine the green curry paste with the oil and cook until an aroma emerges for a couple of minutes (BECAREFUL and don’t burnt he paste) 2) Add ½ the can of coconut milk and cook for 4 minutes, until the oil separates from the milk. Add the chicken strips andprigs of cilantro 3) Cook until tender 4) Add the remaining coconut milk and check the seasoning for salt 5) Serve with a splash of lime juice Rice 1) Wash rice thoroughly 2) Add the rice and 1 cup of water to a pan with ½ tsp salt. Bring to boil and reduce to simmer and cook covered for 12-15 minutes. When the rice is soft, fluff with a fork and serve. Serving Suggestions Serve with any steamed greens. Pearls of Wisdom Some people marinate the chicken in the green curry and then cook it. I prefer to break down the green curry paste in the pan first to draw out all the flavors.

Jared, an old and dear friend of my brother’s, spent many vacations at our house in London during their college years (trekking back to Singapore for every holiday being far too excessive, even for the most well-healed of students). Almost becoming a second son, my parents loved having him around because of his positive influence and intense focus on his studies. Hoping that my brother would pick up some of these good habits, there were frequent conversations of the type, ‘look at Jared….why can’t you be more like him….he works so hard’. So many evenings were spent with Jared studiously ‘revising’ and Sanjay busily ‘creating the mood to revise.’ Eventually their collective hunger pangs would take over and the two would head for the kitchen. It was here that Jared would fire up the stove and out would emerge these quick but enchanting looking Singaporean meals. Cuts of meat which felt unconventional 15 years ago yet now can be seen on the hottest menus in town (such as, pork belly and lamb neck fillet) are the types of meat he would employ. When Jared was here relatively recently, I tried desperately to obtain some of these recipes, but like most married men, he was suffering from ‘kitchen amnesia’. In fact he couldn’t even remember ever going into the kitchen! I used to love the wok fried lamb over a bed of fettuccine that he often made. Luckily the taste was vivid and after much teasing and toiling of my brother’s memory, we finally nailed the recipe!! The sweet, spicy and sizzling lamb over the sesame-oil-and-oyster-sauce fettuccine is a perfect combination. In fact even after developing a more seasoned palate, I still find the pairing with ribbons of thick and flat pasta a genius move!! Ingredients Lamb 1 ½ pounds of lamb neck filet or boneless shoulder, cubed in to small pieces ¼ cup of soy sauce 2 tbsp. of sesame oil 1 tsp. pepper 1 tbsp. sugar Fettuccine 1 lb of fettuccine 3 tablespoons of oystersauce 2 tablespoons of sesame oil Method Lamb 1) Marinade the lamb in the soy sauce, sesame oil and pepper 2) Heat your wok/ frying pan on high heat 3) Add oil and then add half your lamb pieces. Sautee for about 5 minutes. Remove excess liquid and add ½ the sugar. Continue sautéing until lamb is dry and crisped on the outside. Add a dash of soysauce to the hot lamb. 4) Set aside and repeat with the second batch. Fettuccine 1) Cook the fettuccine to al dente as per packet instructions 2) In a mixing bowl, wisk the sesame oil and oyster sauce together 3) Toss with the cooked fettuccine Plating 1) Arrange the fettuccine in a bowl with the wok fried lamb served on top 2) Drizzle with chili oil Serving Suggestions 1) Serve with any greens, such as, Chinese broccoli, Bok Choy Pearls of Wisdom 1) There is no salt in this dish by design and it is not simply an oversight. The soy sauce is salty and does not require any additional salt 2) Removing the liquid at the wok frying stage is important as it removes a lot of the fat and it allows for the lamb to have a ‘sizzled’ taste.
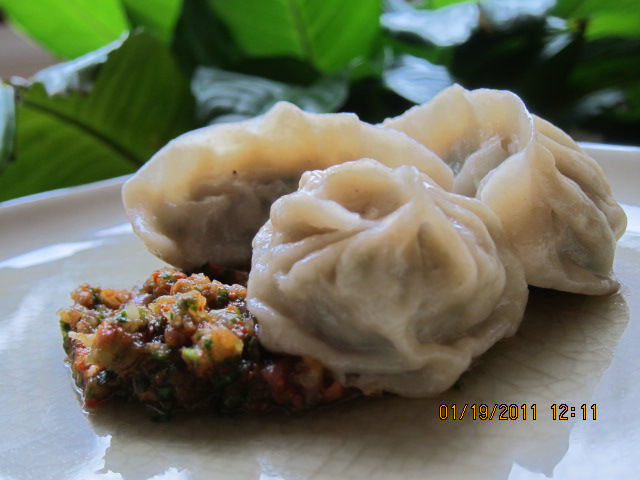
My family and I have spent many evenings feasting on Tibetan potstickers: Momos. This is one dish that does not discriminate between the young and the old. Pretty parcels of dough with fillings of seasoned ground meat or vegetables transports children to some far off Wonderland of the East. Momos may be another version of a dumpling for us, and yet there is a cultural and geographical context from which these steamed and stuffed cushions emerge. Sitting on the highest altitude on earth and with neighboring countries of India and China, it is by no accident that this dish is made with the meat of a Yak, uses the few ingredients it’s soil is able to grow and draws from Indian spices and Chinese cooking techniques. My dear friend ‘Kelsung’ makes the most delightful and moist momos. After several months of eating her Tibetan delicacies, it finally dawned on me to learn how to make them . Of course, using Yak meat is not an option for people living outside of Tibet, however ground beef, chicken or lamb does the trick. Ingredients Dough 3 cups of all purpose flour ¾ cups of water Filling 8 scallions finely chopped 1lb ground chicken or beef 1 diced onion 1 tsp of grated garlic 2 tsp of grated ginger ¼ tsp of water 2 tbslp oil 2 tsp salt 1 tsp pepper ¼ tsp red chili powder Spicy relish – “Tsal” 1 fresh tomato 5 cloves of garlic 1 handful of cilantro 2 green chilies 1 tsp salt Method Dough 1. Knead the dough and set aside for 30 minutes 2. Break in to about 36 pieces and dust over with a little flour to stop them from sticking to each other 3. Dust the surface with a little flour and roll in to small circles Filling 1. Combine filling ingredients Making the Dumpling 1. Stuff 1 tbspn of the mixture across the middle of the dough circle 2. Pinch the ends of the circle together making little crescent shapes 3. You can cook the dumplings in a steamer for 20 minutes Or Add a little oil to a non stick frying pan, add the dumplings so that they brown a little and then cover them ¾ of the way with water on med/high heat. Cook covered in the pan until the dumplings have fully absorbed the water – approx. 15 minutes Relish “Tsal” Combine all the relish ingredients in the food processor and blend until you reach the desired consistency Serving Suggestions The authentic way to eat them is simply with the tomato relish. The Tibetans also add the momos to soups. Pearls of Wisdom To make this dish even simpler, you can purchase wonton wrappers instead of making and rolling your own dough. If you find it difficult to make the crescent shape, put the filling in the middle and pull up the ends in to a satchel shape

So there I was on this gorgeous Friday afternoon last week at the food magnet of an event: the NY food and wine festival. I was really looking forward to it and what made it even more appealing was that I would be hanging out with my very dear and generous friend and mentor ‘Suvir Saran’. Suvir, who I know will cringe at reading this, is a humble ambassador of Indian food. He is a celebrity chef, restaurateur, and has taken on a pedagogic role of being a food ‘educator’. He goes beyond a comfort zone for most and teaches people about Indian cuisine in remote places all over the world where one would question the receptivity of such an education. Talking to him always shifts my paradigm on food and this time, it shifted to a place surpassing my usual spin of taste and texture to a place of awareness and responsibility. We talked about peanuts. Could a conversation about peanuts ever amount to much? In the entertainment sense, it is synonymous with elephant circus stunts, in the financial sense, earning ‘peanuts’ is hardly exciting and in the food sense it is nothing more than an evil allergen. For those of you that are allergic (including me), it isn’t an easy allergy to deal with. But for those of you that don’t, I am talking to you. There are all kinds of allergy causing food products which are higher up the list in terms of the number of sufferers, such as fish, shellfish, milk, eggs, tree nuts. Yet propaganda has spared them and people have not stopped buying these items or bringing them to school for bake sales. Peanuts are a great source of anti-oxidants and oleic acid (healthy fat found in olive oil) and there are so many varieties that go beyond the ‘laden with salt bar snacks’. Are you becoming present to what you are missing? For more information, I invite you to check out: http://www.nationalpeanutboard.org/ In addition to it’s nutritional value, the peanut also addresses the new shift in thinking of ‘keep it as local as possible’. As Suvir informed me ‘It is American, in the larger sense of that word. It is from the Americas and has existed as long as one can trace the histories of these two continents. It was so appreciated and loved that it traveled the world over. Better still, wherever it went, it also made the people of those areas think it was theirs forever and became popular without much fuss. Of course peanut butter has given many kids their first taste of vegetables. Use it as you would hummus around kids and they will eat almost anything. A good first beginning. Talk of eating local. But peanuts. They are farmed in the US. Peanut farmers work VERY hard and under very trying natural conditions. Too little or too much rain. Too cold or too hot days. And still, as they know how people love them and how good this modest nut is, they continue to farm. Buying American peanuts also ensures that you get the best quality. Of course you leave a lower carbon footprint and better still, you are buying fresher peanuts. They have not traveled in ships for months or languished in bad conditions at a port of call. Do you read your labels? Reading labels can make all the difference. Firstly they tell us where something is from. American peanuts will be fresher, tastier and safer for consumption. Since our standards around hygiene are maintained quite differently from some other countries producing nuts and shipping them our way. A few cents more sometimes can safeguard you in ways a few dollars saved can only compromise your health and wellness if something tragic were to happen. Penny wise pound foolish! Secondly reading labels is a great exercise around understanding what it is you are putting into your mouth and through it into your body. You are what you eat! So take some time, make an intelligent decision.’ Now to the ‘put your money where your mouth is’ part, today’s recipe is: Kung Pao Chicken. The peanuts are characteristic in this dish. The combination of the spicy and nutty flavors, the crunch of the nuts and scallions and the slightly sour taste from the rice vinegar and rice wine (mirin)makes you feel like you’re eating street food in Hongkong’s famous Graham Street. The only in authenticity of this dish is the absence of Szechuan peppercorns and the absence of deep frying at any stage of the cooking process. Ingredients ½ cup of peanuts 5 whole red chilies 4 cloves of garlic (chunkily chopped) 2” piece of ginger (chunkily chopped) 6 Scallions chopped 2 tbsp honey 5 tbsp of chicken stock 2 tbsp soy sauce 1 tbsp vinegar 1 tbsp corn starch 1 tsp sesame oil Salt to taste Chicken & Chicken Marinade 1lb 1” diced pieces of chicken 3 tbsp soy sauce 1 ½ tbsp mirin 1 tbspn corn starch ¾ tbspn sesame oil Method 1. Combine all marinade ingredients and marinade chicken for 10 minutes 2. Heat the wok on high, add 2 tblsp of oil and the peanuts and keep stiring. As the peanuts become goldenbrown in color, remove immediately (approx 1 ½ minutes) 3. In the remaining oil, sauté the chicken on high heat and cook for approx 7 minutes 4. Remove chicken and set aside 5. Add 2 more tbsp of oil and throw in the chilies, continuously tossing until they turn a shade of burgundy 6. Add the chopped ginger and garlic and after 1 minute, add the white part of the chopped scallions. 7. In a separate bowl, combine: honey, chicken stock, soy sauce, vinegar, corn starch, sesame oil and salt to taste 8. Add this mixture to the pan and cook for 2 minutes 9. Add the chicken to the pan and just before serving, toss the scallion greens and peanuts Serving Suggestions Serve with jasmine rice. If you like …

I have always admired a friend of mine called ‘Juhi Singh’ for her many talents. Achieving so many things in a day, I am convinced that hers consists of more than 24 hours. She is a well known acupuncturist and yoga instructor in New York and is now launching a sleep therapy C.D (www.sleepuntiltomorrow.com). If that wasn’t enough to make one feel really inadequate in her presence, she is also a fantastic cook. One day she made this amazing dish of Sea bass with an Asian twist. The flavors were Thai, Malaysian and Indonesian and had a melodious-like impact on the palate. After that moment, my brother and I scrambled to get the recipe from her. I made it, he made it, my husband made it, people in other social circuits in New York made it, people in London made it and once my mother’s “Kitty Party” friends got a hold of this recipe, this dish spread like wild fire. The dish was simple to make and yet it dominated the conversation at the dinner table. There is a nutty, sweet and spicy flavor and if you use a buttery fish (such as,Sea bass) this combination takes the dish to a whole new level of ‘comfort’. With few steps and just a couple of key ingredients, this dish produces a very high social return on minimal time investment. Ingredients serves 6-8 people 2 lbs filled Sea bass 3 cloves of garlic thickly sliced ¾ can of coconut milk ½ of the large bottle of Soyvay’s ‘Veri Veri Teriyaki’ 3 green chilli’s sliced in half Handful of cilantro leaves Method 1) Heat oil in a pan and cook the garlic until golden 2) Add the ‘Veri Veri Teriyaki and cook for a couple of minutes on medium heat 3) Add the coconut milk and cook on medium heat until oil begins to separate from the sauce 4) Season with salt and pepper and squeeze in the lime juice 5) Gently lay down your pieces of fish and bathe the fish in the sauce by gently spooning the mixture over the pieces. After approximately 10 minutes, your dish is ready. Serving Suggestions Rice and any steamed or sautéed greens. I used broccoli rabe to balance the sweetness of the sauce Pearls of Wisdom I usually make this fish with Sea bass but for this entry I used black cod given that it is a fellow fatty fish. After trying both, I would definitely choose the Sea bass next time. It is more buttery and has a milder flavor.

The weather is beginning to crispen in NY and whilst many of us have had enough of this heat, the thought of the summer coming to an end leaves us with a bitter-sweet emotion. Memories of beaches, the smell of sunscreen, the heat extinguishing ice creams and sorbets will very soon be lost amidst sweaters, heavy jackets, socks and shoes. As we add more layers to ourselves, we remove a little proximity we created with people in our light-hearted summer spirit. Of course each season is to be celebrated for reasons particular to them but today we are going to honor our last few days of the summer…. farewell my summer love. For me, summer is synonymous with fresh salads, citrus flavors, herbs with spring in their step, such as, mint, basil, cilantro, lightly prepared sea food..ok, I am beginning to get the taste of Thai Tiger Prawn rice noodle salad. It’s probably the last time I can serve my husband a salad for dinner with ‘summer intentions ‘rather than ‘lazy intentions’. As for the salad, it’s really more than just a salad. It is perky personified! It has a wonderful texture of the soft noodles and plenty of crunch from the shallots, peanuts, heat from the fresh chilies, tang from the citrus and the lightly liquoriced flavor from the Thai basil, not to mention the impact of the cilantro and mint…and if that wasn’t enough we have the blackened tiger prawns to top it all off. Ingredients Juice from 2 fresh limes 2 tbsp of soy sauce 2 tbsp fish sauce (nam pla) 1 tbsp sesame oil 6 tbsp olive oil 2 sticks of finely chopped lemongrass 1 tbsp palm sugar or brown sugar 3 shallots (1 shallot should be finely minced and the other 2 should be finely sliced) 4oz rice vermicelli noodles (3/4 of a packet) 2 fresh minced garlic 1 handful of french beans 3 green chilies – finely sliced (deseeding, optional) ½ of an unripe mango – cut in half and finely sliced length wise ½ of a finely sliced red bell pepper 1 medium-sized, finely cut carrot 4 finely sliced scallions (including the green part) 2 handfuls of cilantro leaves (break apart by hand) 1 handful of mint (break apart by hand) 2 handfuls of fresh Thai basil (break apart by hand) 1 tspn of toasted sesame seeds 1 handful of lightly toasted and chopped peanuts If you can’t find thai or holy basil, don’t worry about the food snobs..regular basil will do just fine. Salt to taste Shrimp Marination 1 lb of peeled and de-veined tiger shrimps (keep the tails) 3 tbsp soy sauce 1 tbsp fish sauce 1 tbsp sesame oil 1 tbsp brown sugar 1 tsp spirarcha chili sauce Method Dressing & Tossing 1. Mix the lemongrass, olive and sesame oil, garlic, shallot, lime juice, lemon grass, fish sauce and soy sauce together. 2. Blanche the beans: set aside a medium sized pot of boiling water, add the French beans for 2 minutes, pull them out and dip them in to iced water (this will bring out a deep green color whilst maintaining crispness). Drain well. 3. Using the boiling water, switch off the heat and add your noodles and allow to stand for 10 minutes. Drain well and allow to cool. Roughly cut the noodle strands 4. Combine all salad ingredients (the dressing, beans, noodles, herbs, nuts and seeds and fruit and vegetables) 5. Toss thoroughly Shrimp 1. Heat a pan or wok 2. Add olive oil and cook the shrimp in small batches on high heat, allow shrimp to blacken on one side and then pull off the heat to avoid over cooking (after approx 3 minutes) Serving Suggestions Enjoy as is Pearls of Wisdom 1. Drain noodles thoroughly or it will make the salad soggy 2. Only cook shrimp when you are ready to eat 3. Cardinal rule: Don’t over cook the shrimp

Somebody at the farmers market recently introduced me to Shiso leaves and scallion micro greens. Breaking off the respective leaves, I mulled over them in my mouth for a few seconds. Interesting flavors I thought. The Shiso had notes of cumin, but very slightly. I wasn’t sure how I would use them in cooking but figured that I would think about that later. The scallion micro greens looked like watercress, but tasted like a scallion (spring onion), now there’s a surprise. ‘I’ll take them both!!’ it is nourishing for the soul to take a risk now and then. On my way home, people stopped me on the bus, in the elevator, in the candy store to find out exactly what these leaves were. Was this my Warhol 15 minutes of fame?? Then a lovely Japanese lady stopped me and informed me of how often Shiso is used in Japanese food. So finally, a little context on Shiso, however, she didn’t quite share ‘how’ and there I was back at square one. Thinking about the flavors of the scallion micro greens and red shiso or rather hints of onion with hints of a cumin and anise hybrid, I knew that I wasn’t going to alter the flavor by sautéing, frying or grilling. I wanted them to taste as they had when I broke them off the stem for tasting at the farmers market. I decided to work them in to a tapenade and really maintain the freshness and colors which drew me to them. Not wanting to create too much drama with this tapenade, I simple stove-top toasted a piece of whole grain bread and spread my tapenade over it. I topped this garden of Eden toast with prosciutto and speck. The deep green color of this tapenade with hues of burgundy and flecks of white from the parmesan cheese add aesthetic value to this spread and the sesame oil adds an Asian touch. I was ready to unwind with my open faced toasted sandwich and my Jazz C.D…another delightful purchase from the farmers market. I would love to add here that my snack was accompanied by a glass of white but since need comes before luxury, I turned to my caffeine friend ‘Earl Grey’. Ingredients 4 cloves of garlic 2 cups of red Shiso 1 cup scallion microgreens 1 cup of parmesan cheese 1 cup of olive oil 1 tbsp sesame oil Juice from ½ a lemon ½ lemon rind kosher salt and fresh cracked pepperWhole grain bread Method Tapenade 1. Crush the garlic in your food processor 2. Add your de-stemmed shiso leaves and scallion microgreens 3. Give them a few pulses in the blender..careful not to over blend or it will become pasty 4. Add ½ half the grated parmesan cheese, the lemon rind, sesame oil and olive oil and give it a quick whizz 5. Add the remaining parmesan cheese, lemon juice and salt and pepper to taste Stove-Top Toasted Bread 1. Heat a non stick an on high 2. Cut thick slices of whole grain bread 3. Add olive oil to the hot pan 4. Lay the brown bread on pan and brown on each side for 2 minutes (until it forms a crust) Serving Suggestions If you wish to serve this as a main course, simply toss over pasta. It could also work well as a marinade for meats and fish. You may also serve as an appetizer, spread over crostini. Pearls of Wisdom I must confess that I added too much salt to my tapenade. Please don’t make the same mistake. Given that the parmesan is a salty cheese, taste the tapenade before adding the salt to see how much is required.


